User Guide
Guidance for members on TNW with its unique systems.
- Rules
- How to Join
- Resource Pack
- Flight Mode
- Claims
- Sign Shops
- Role-play System
- The Block Pit
- Creating a Town
Rules
Rules
The following are the list of rules that apply to the WOFTNW community.
General Rules
These rules apply to all WOFTNW servers, regardless of location, game platform, etc.
- Have a good attitude.
- Treat everyone with respect and politeness. Being disruptive, aggressive, disrespectful, creepy, or incitive is prohibited.
- Hate speech of any kind is strictly prohibited.
- Threats toward the server are strictly prohibited.
- Fighting, trolling, spamming, instigating, and harassment is strictly prohibited.
- Do not share NSFW content of any kind.
- This includes graphic violence, pornography, profanity, nudity, or other potentially disturbing subject matter.
- This applies to Discord user profiles and Minecraft usernames and skins.
- Please limit/censor heavy topics.
- Please do not vent here! If you need to vent you can ask if anyone is available to vent in DMs, or you can talk to a trusted friend or adult. We also advise you to look at #health-resources.
- Please limit religious and political discussions.
- Please keep conversations in English.
- Respect all of our staff and their decisions. If you believe a staff member is unfairly targeting you, please open a ticket.
- Do not ship or make jokes about others when they have said it makes them uncomfortable.
- Use common sense when it comes to all rules. You will be warned for bending the rules!
Minecraft Rules
These rules apply to our Minecraft server. All rules listed in the General Rules section are still applicable!
- The Minecraft server is PG. Be considerate to young players; no inappropriate speech, builds, books, signs, player skins, item names, mob names, or other content of any kind.
- Words like “damn” and “hell” are allowed in moderation so long as they are not directed at others.
- No cheating. This includes but is not limited to: x-ray, auto-clickers, macros, duplicating items, and player trackers (including maps).
- This includes bypassing the AFK kicker with any sort of automated device or program.
- No excessive advertising.
- Sharing your socials with friends or when asked is okay.
- Weapon names are okay as long as they are not excessive. (e.g. "Everyone subscribe to my YouTube channel!")
- Do not attempt to bypass or exploit systems.
- This includes leaving the main map or any other intended play areas.
- If you find a bug, glitch, or exploit, report it to a staff member or in #bug-report. Report severe bugs in a #ticket.
- Do not purposefully aim to crash or otherwise ruin the in-game economy.
- No griefing or stealing from other people’s builds and belongings.
- Refrain from causing lag or slowing the server.
Discord Rules
These rules apply to our Discord server. All rules listed in the General Rules section are still applicable!
- All Discord Community Guidelines and Discord Terms of Service apply. This includes but is not limited to:
- Do not promote, coordinate, or engage in harassment.
- Do not threaten to harm another individual or group of people.
- Do not share or threaten to share the personally identifiable information (PII) of an individual without consent.
- Do not organize, promote, or support violent extremism.
- Do not share content that glorifies, promotes, or normalizes suicide or other acts of physical self-harm.
- Do not share real media depicting gore, excessive violence, or animal harm, especially with the intention to harass or shock others.
- Do not share false or misleading information (otherwise known as misinformation).
- Do not share content that violates anyone's intellectual property or other rights.
- Do not mention staff roles without good reason.
- Do not overuse emojis or reactions.
- Do not attempt to bypass AutoMod.
- If you're not sure why AutoMod is blocking your message, open a ticket and ask.
- Do not impersonate any other people, players, or bots.
- Fictives and Factives in OSDD-1/DID systems do not count to this rule! Just be sure that if you are a Fictive/Factive to mention as such, just to avoid any misunderstandings about impersonation.
- Do not post content that contains media you do not have explicit permission to use.
- Warn and spoiler any media containing shocking/disturbing content, any real weaponry, flashing lights, bright colors, or loud noises.
- No advertising in DMs. Use #advertisements for all personal advertisement.
- Use channels for their intended purpose. If a conversation no longer fits the current channel, move elsewhere.
Rules System
We work on a three-strike system. For every instance of a violation of our rules, one strike will be recorded. Attaining three strikes within three months will result in a suspension from the Minecraft server and Discord server in which you will not be able to join in Minecraft or interact on Discord. This is usually two weeks, but varies depending on the severity of infractions.
Depending on the severity of one infraction, we may issue a double-warn, which is worth two strikes, or even jump straight to a suspension or ban. All results are at our discretion and judged on a case-by-case basis.
Individual infractions expire three months after their issued date. They are still logged for our records, but once the three month threshold is passed they will not count towards a suspension or ban.
If a player has been suspended, they are more than welcome to reach out to us after six months of their issued suspension to ask about the removal of their suspension from record and reset to a clear standing; this is judged on a case-by-case basis. If a player has been permanently banned, the ban is irrevocable by appeal.
Save for severe instances, you will always be notified when we record an infraction and you have the opportunity to ask questions and appeal the infraction if it was made mistakenly.
Infraction Privacy
As we issue infractions, we operate under the conclusion that they are privatised, meaning that we do not announce punishments given to players. This is judged on a case by case basis. The only exception to this clause are when the staff members collectively agree that there is either a safety issue concerning our players/the player removed.
In the event of a member's permanent removal from the server due to a safety concern on the half of our player base, we will typically announce the member and what you can do to avoid any safety concerns. We take safety and security very seriously, and will always put you first if there ever comes a time where someone poses a threat to our community.
In the event of a member's permanent removal from the server due to a safety concern on THEIR half, we will elect to respect their concerns and take the action they deem necessary; this is judged on a case by case basis.
In conclusion, the vast majority of infractions will not be made public unless the member who received it announces it themselves or the safety of our community is in jeopardy.
Community Integrity
We strive for our community spaces to encourage learning and improvement. Our rules system is designed for members to learn and grow from their mistakes. We would not have many of our own staff members if this space would not have been such.
However, this server is still completely volunteer-run, and we cannot always afford to moderate every instance of every activity on the server. It is a privilege to play on our server and interact with our community. Therefore, with members who do not reflect the intention to grow, the staff team may enact a unanimous vote to take disciplinary action — regardless of if the individual acts in accordance of the rules.
This server is one of connection and kinship, and we want to foster that. At the same time, this community is a safe space and we will never sacrifice that.
How to Join
This article will is intended to help you add your account to the whitelist and join the server. This article has an accompanying video tutorial:
Video
Preparation
To join the server, you need:
- A JavaScript-capable web browser
- A paid Minecraft: Java Edition account
- A compatible device running Windows, MacOS, or Linux. The server is only compatible with the Java Edition of the game that runs on desktop or laptop computers. The Bedrock Edition of the game that runs on smartphones, tablets, game consoles, and Windows is not compatible.
Registering
The server requires that accounts be added to an internal list of players to be allowed to join the server. You can be added to the whitelist either by joining the Discord or using the web whitelist form.
Discord Method
The first option is to join the Discord guild. You'll need a Discord account with a verified email address to do this. Make sure you read their terms of service and privacy policy before creating an account.
- Create a Discord account account here.
- Join the WOFTNW Guild here.
- Complete the onboarding process as directed.
- Open the Minecraft Launcher and ensure you are logged into the correct Xbox account.
- In the #whitelist Discord message channel, send your Minecraft username exactly as shown in the bottom-right of the Minecraft launcher.
Troubleshooting
| Problem | Resolution |
| I can't find the whitelist channel. | Open it using the link. |
| The invite is invalid. | Email us at contact@woftnw.org and we'll fix it. |
| ❌ USERNAME could not be found! | Make sure you type your username exactly as shown in the bottom-right corner of the Minecraft Launcher. You need a paid Minecraft: Java Edition account. |
| ⚠️ USERNAME contains illegal characters! | Usernames are alphanumeric and cannot contain spaces. Make sure you haven't added any spaces or special characters. |
If you're still having trouble, ask for help in the #questions channel or email us.
Web Form Method
If you don't want to use Discord, you can add your account through the web form.
- Open the web whitelist form.
- Open the Minecraft Launcher and ensure you are logged into the correct Xbox account.
- In the text input box, type your Minecraft username exactly as shown in the bottom-right of the Minecraft launcher.
- Press submit.
Playing
- Open the Minecraft launcher.
- Launch your Minecraft 1.21.4 installation.
- If you do not have one, create one.
- Open the Multiplayer menu.
- If you DO NOT have the server already:
- Click Add Server.
- Set the Server Name to whatever you want, like Wings of Fire.
- Set the Server Address to
play.woftnw.org. - Click Done.
- Click the WOFTNW server entry.
- Click Join Server.
Resource Pack
This article will is intended to help you enable the server resource pack. This article has an accompanying video tutorial.
Check what is working
- Join the server and go to the hub with the
/hubcommand. - Drop down to the lower level and follow the orange path to the Wing Selection. Click the button of any tribe.
- The wings on display should look like dragon wings, with each being a different color.
Enabling the Server Resource Packs
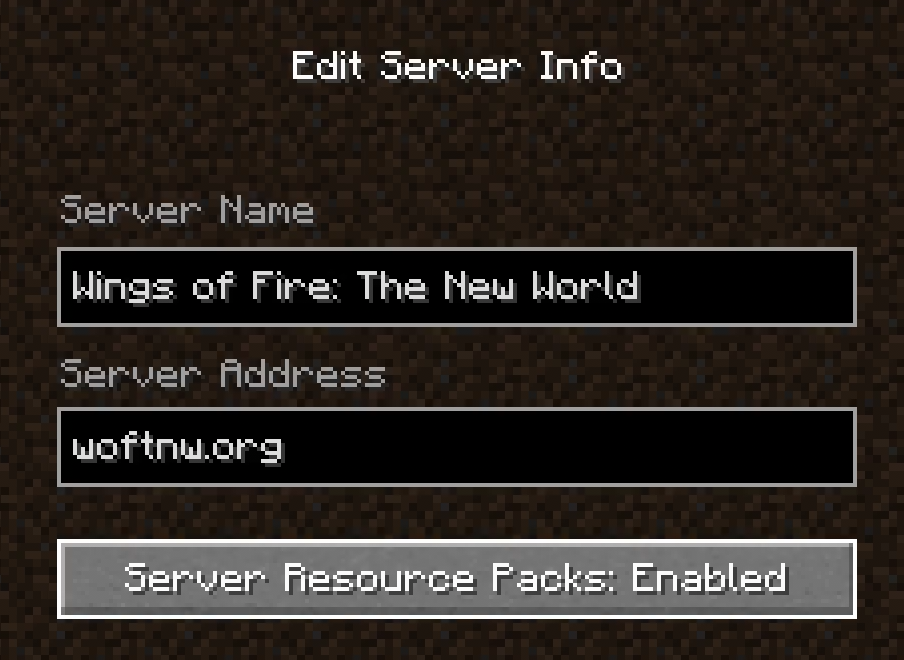
- Disconnect from the server and open the multiplayer menu.
- If the server is not in your server list, add it now.
- Select the server in the list and click the Edit button.
- Click the Server Resource Packs button until it says Enabled.
- Click Done.
The server resource pack will automatically be applied when you connect and removed when you disconnect. It will always remain at the top of the resource pack stack. If either of these is not favorable, you can always download the latest version of the resource pack from GitHub.
Flight Mode
You can enter flight mode by double-jumping just like in Creative Mode. You can then fly omnidirectionally as long as you have energy, which is indicated by a progress bar at the top of the screen. Your energy depletes depending on how much you're moving, so hovering still or moving down doesn't deplete it!
You can switch to Glide Mode by double-jumping again, which will put you in standard elytra gliding even if you're not wearing elytra.
If you run out of energy, you'll be switched into Glide Mode and you must wait for it to recharge to half full. Energy recharges whenever you're not in Flight Mode, including when you are falling or in Glide Mode.
As long as your energy meter is green, you will not take fall damage.
Claims
Wings of Fire: The New World uses a claiming system so that you can protect your property. Others will not be able to modify blocks or open containers unless you give them permission to. This article will is intended to help you create and manage a claim.
Creating a claim
To create a claim, start by identifying the area you want to claim. You are given a limited number of claim blocks, and the number of which you possess can be checked with /gd player info and hovering over the book in the GUI. The Remaining Blocks is the number of remaining claim blocks available to you. A claim's size in claim blocks is its area, X dimension times Z dimension. The Y dimension, up and down, is not accounted in the number of claim blocks a claim uses.
/gd player info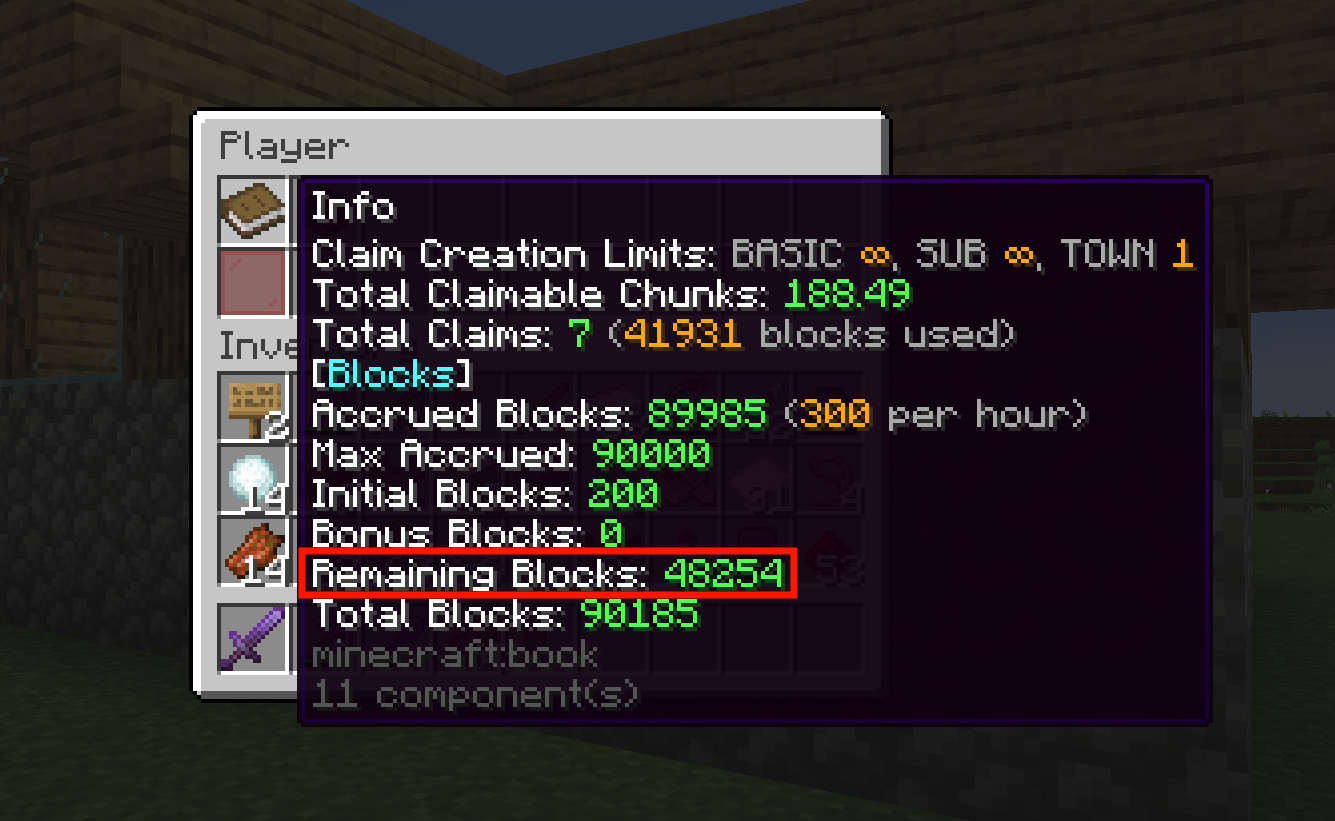
Choose one corner on the ground, and choose an opposite corner that is in the air. Use the /claim command to enter claim mode.
/claim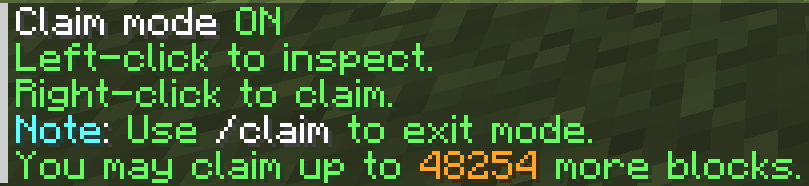
Right-click the block at the first corner. You will be told that one corner has been set.
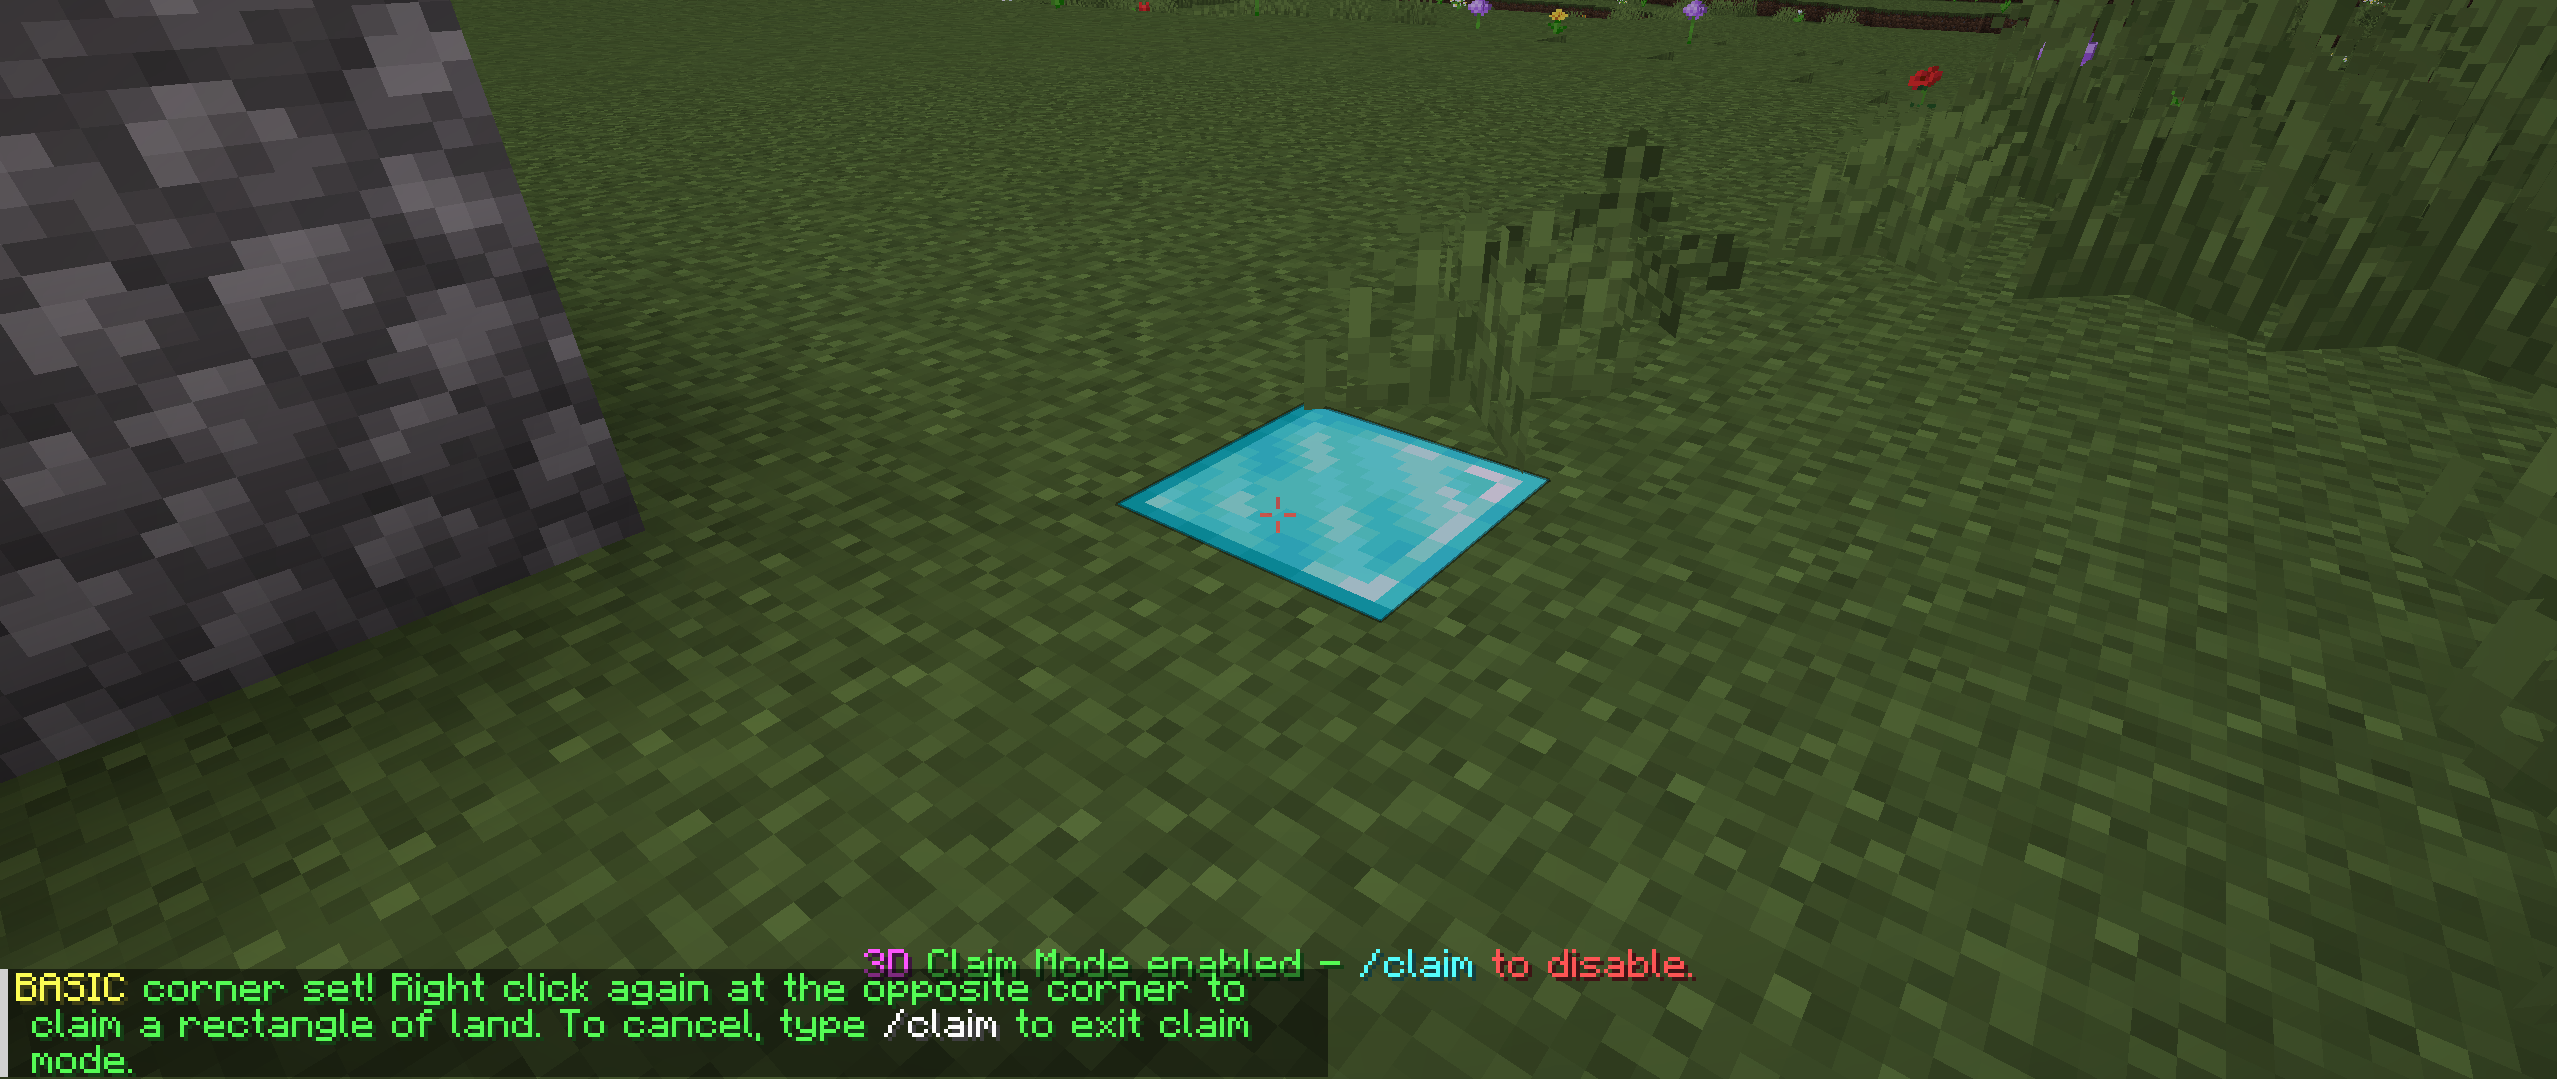
Right click the block at the opposite corner. You will be told that your claim has been created.
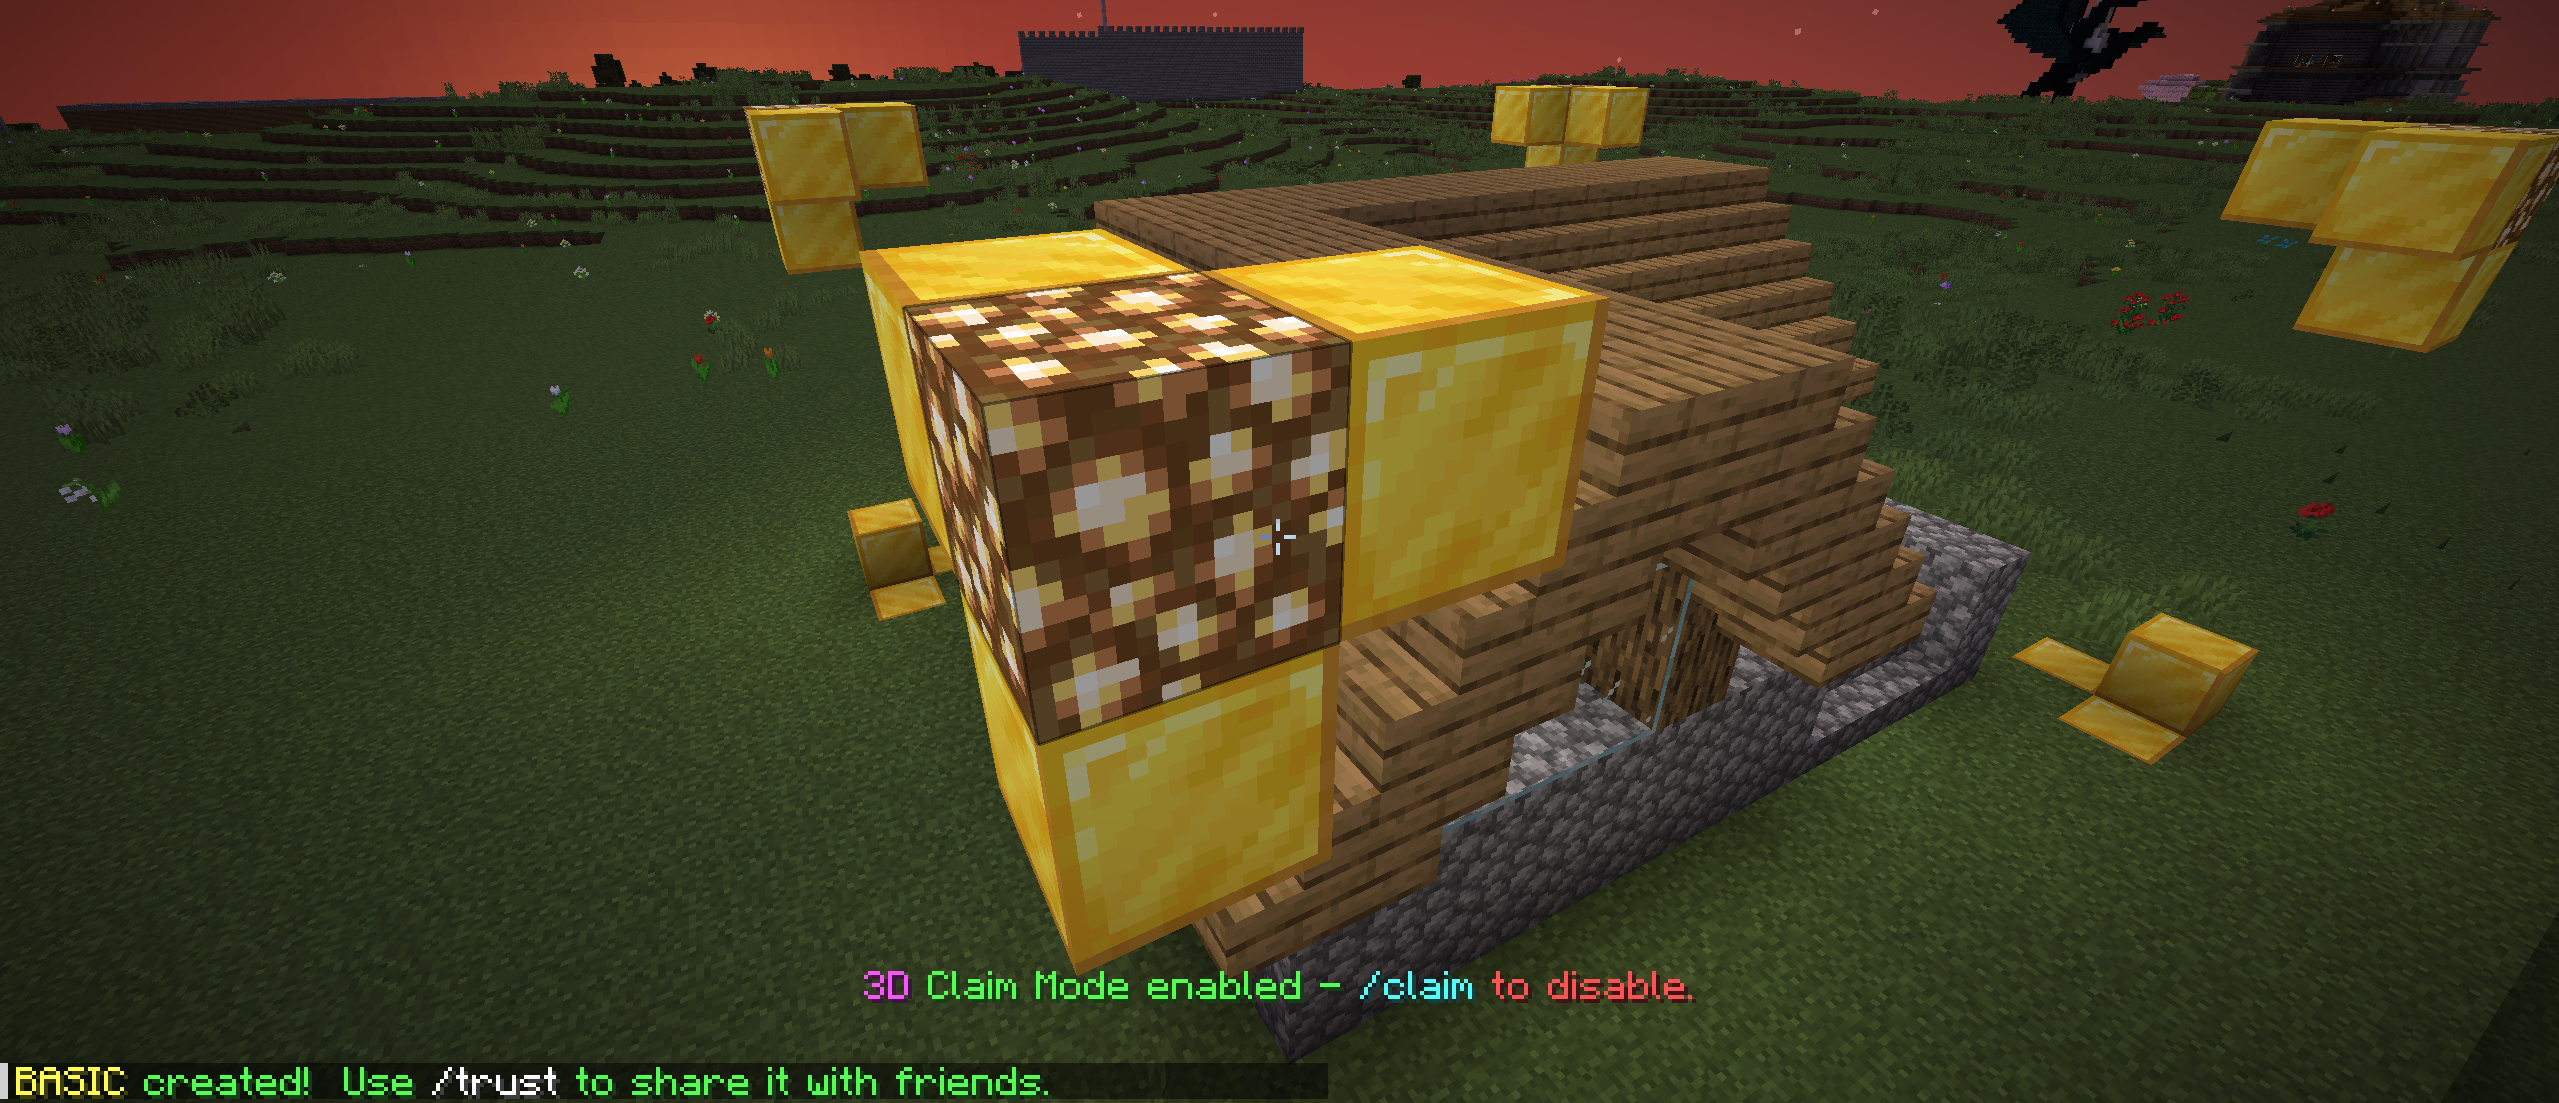
Because claims are three-dimensional, you may need to expand the top and bottom of your claim. This up-and-down variation does not affect the number of claim blocks the claim uses. You can use /expandclaim <amount> <direction> to move a side of your claim outwards. Similarly, you can use /contractclaim <amount> <direction> to move a side of your claim inwards.
Managing a claim
You can give other players varying levels of trust by standing inside your claim and executing /gd trust player <player> <type>. Listed below are the levels you can grant; note that each level also includes those above it as well:
- None: Disallows a player from interacting with your claim.
- Accessor: Allows a player to interact with blocks.
- Resident: Allows a player to create subclaims/claims inside your claim. Residents can give accessor trust to other players to the claims they create inside your claim.
- Container: Allows a player to access inventories of containers (e.g. furnaces, chests, barrels, etc.)
- Builder: Allows a player to break and place blocks.
- Manager: Allows a player to give the above levels of trust to any other player.
You can see a list of all players you have trusted with /trustlist. You can also use /gd trust player all <type> to apply the permission to all players.
Sign Shops
You can use sign shops to purchase items from other players and sell items to other players.
Interacting with Sign Shops
You can recognize a sign shop by its top line. The top line of a sign shop will always be blue and surrounded in square brackets [like this].
When you interact with the use button (default right mouse button), you will be given details in the chat about what the sign shop does. For example, you can learn about the items being sold by a [Buy] sign.
When you interact with the attack button (default left mouse button), you will activate the sign shop. For example, will exchange money for items of a [Buy] sign.
Sign shop interactions cannot be undone.
Creating a Sign Shop
There are several types of sign shops you can create. This guide will show you how to set up a [Buy] sign. It allows you to sell items in exchange for the customer's money.
You will need:
- One container (such as a chest)
- One sign (of any wood type)
- One redstone dust
Place a container somewhere in the world. This is commonly a chest or barrel. It can be located anywhere, but it is commonly placed near the location of the sign shop. In the container, place the amount of items you want to sell for a single transaction. If you want to sell 16 cobblestone for $16, place 16 cobblestone in the container.
Place a sign somewhere in the world. On the top line, write [Buy]. On the second and third lines, you can write whatever you want. It is best to describe what you are selling. On the last line, write as a number the price for a single transaction. If you want to sell 16 cobblestone for $16, write 16 or $16.
Hold the redstone dust, look at the container, and briefly tap the attack button (default left mouse button) to store the location of the container. Then, hold the redstone dust, look at the sign, and briefly tap the attack button to link the container to the shop. The shop is successfully activated if the top line is in blue text.
You can test the sign shop now to make sure it does what you want. This will empty the container and your sign shop won't be able to make more transactions. Fill your container with as many items as you want to sell.
Role-play System
Wings of Fire: The New World has an in-game role-play system that uses OpenRP.
Characters
Editing your character
You can edit your active character with the /character command. You'll see something like this:
[name]
[Click to edit]
Bog[tribe]
// HiveWing // IceWing // LeafWing // MudWing // NightWing //
RainWing // SandWing // SeaWing // SkyWing
MudWing[hybrid]
// HiveWing // IceWing // LeafWing // MudWing // NightWing //
RainWing // SandWing // SeaWing // SkyWing // None
None[gender]
[Click to edit]
Male[age]
[Click to edit]
153[description]
[Click to edit]
Bog is orange with distinctive bright blue eyes.
You can click on the interactive components to edit your active character.
Viewing other players' characters
You can quickly view someone's character entry by holding Sneak and pressing Use.

![]()
You can also use the command /character check <player>.
Using multiple characters
You can save your character using the command /character profile save <name>. The name can be whatever you want. It doesn't have to be the name of the character. You can then edit the active character as detailed above and save it with another name.
You can load a saved character with the command /character profile use <name>. This will override the active character, so make sure you have any modifications saved.
Channels
There are three role-play channels: Moon, Winter, and Qibli. By default, all channels are visible to you and the default channel is Moon. You can use the command /rp to send a role-play message to the default channel. You can also use /rpm to send to the Moon channel, /rpw to send to the Winter channel, and /rpq to send to the Qibli channel.
You can switch channels with the command /channelswitch <channel>. For example, you can switch to the Winter channel with the command /channelswitch Winter. By default, all channels are visible. You can toggle the visibility of a channel with the command /channeltoggle <channel>. For example, you can toggle the visibility of the Qibli channel with the command /channeltoggle Qibli.
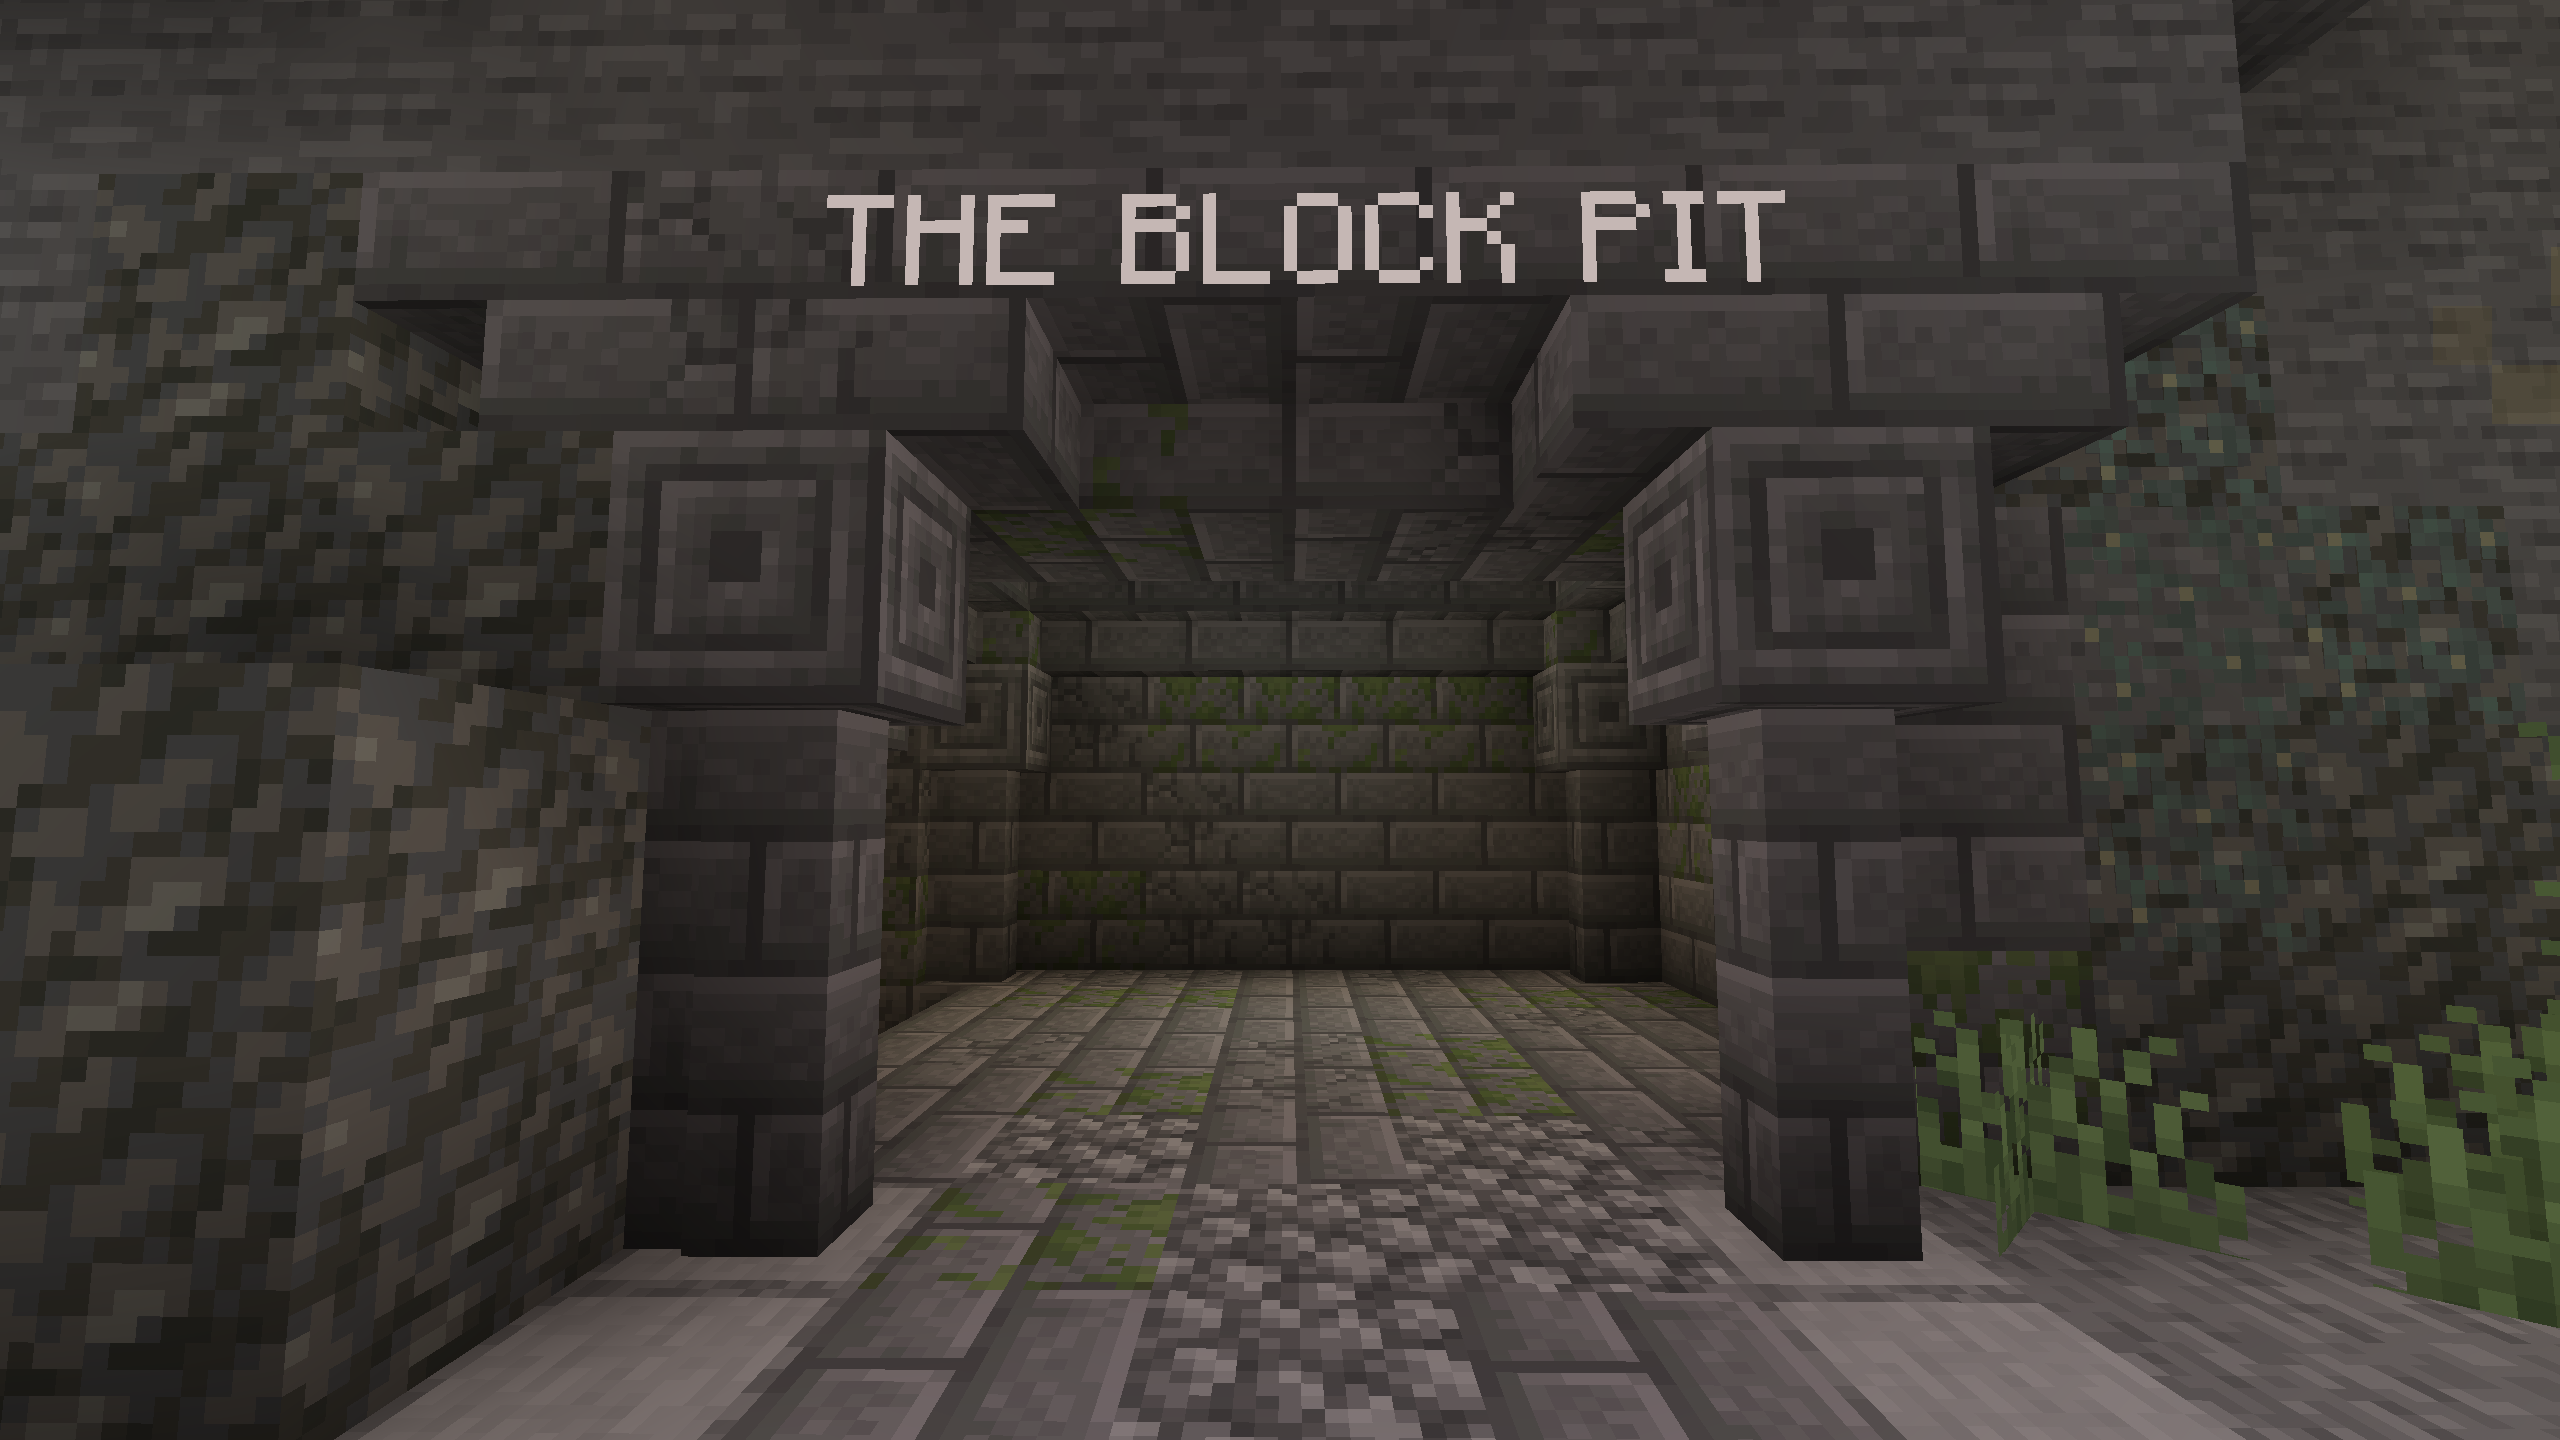
The Block Pit
Instead of gathering resources from Pyrrhia or Pantala, you can easily gather materials at the Block Pit.
Locating the Block Pit
You can find the Block Pit at the Hub.
- Use the command
/hubto go to the Hub. - Go into the blue building labeled Server Events and Minigames.
- Continue walking down the path until you pass under a bridge.
- The entrance to the Block Pit is on the left, directly across from the statue of the one and only fred.
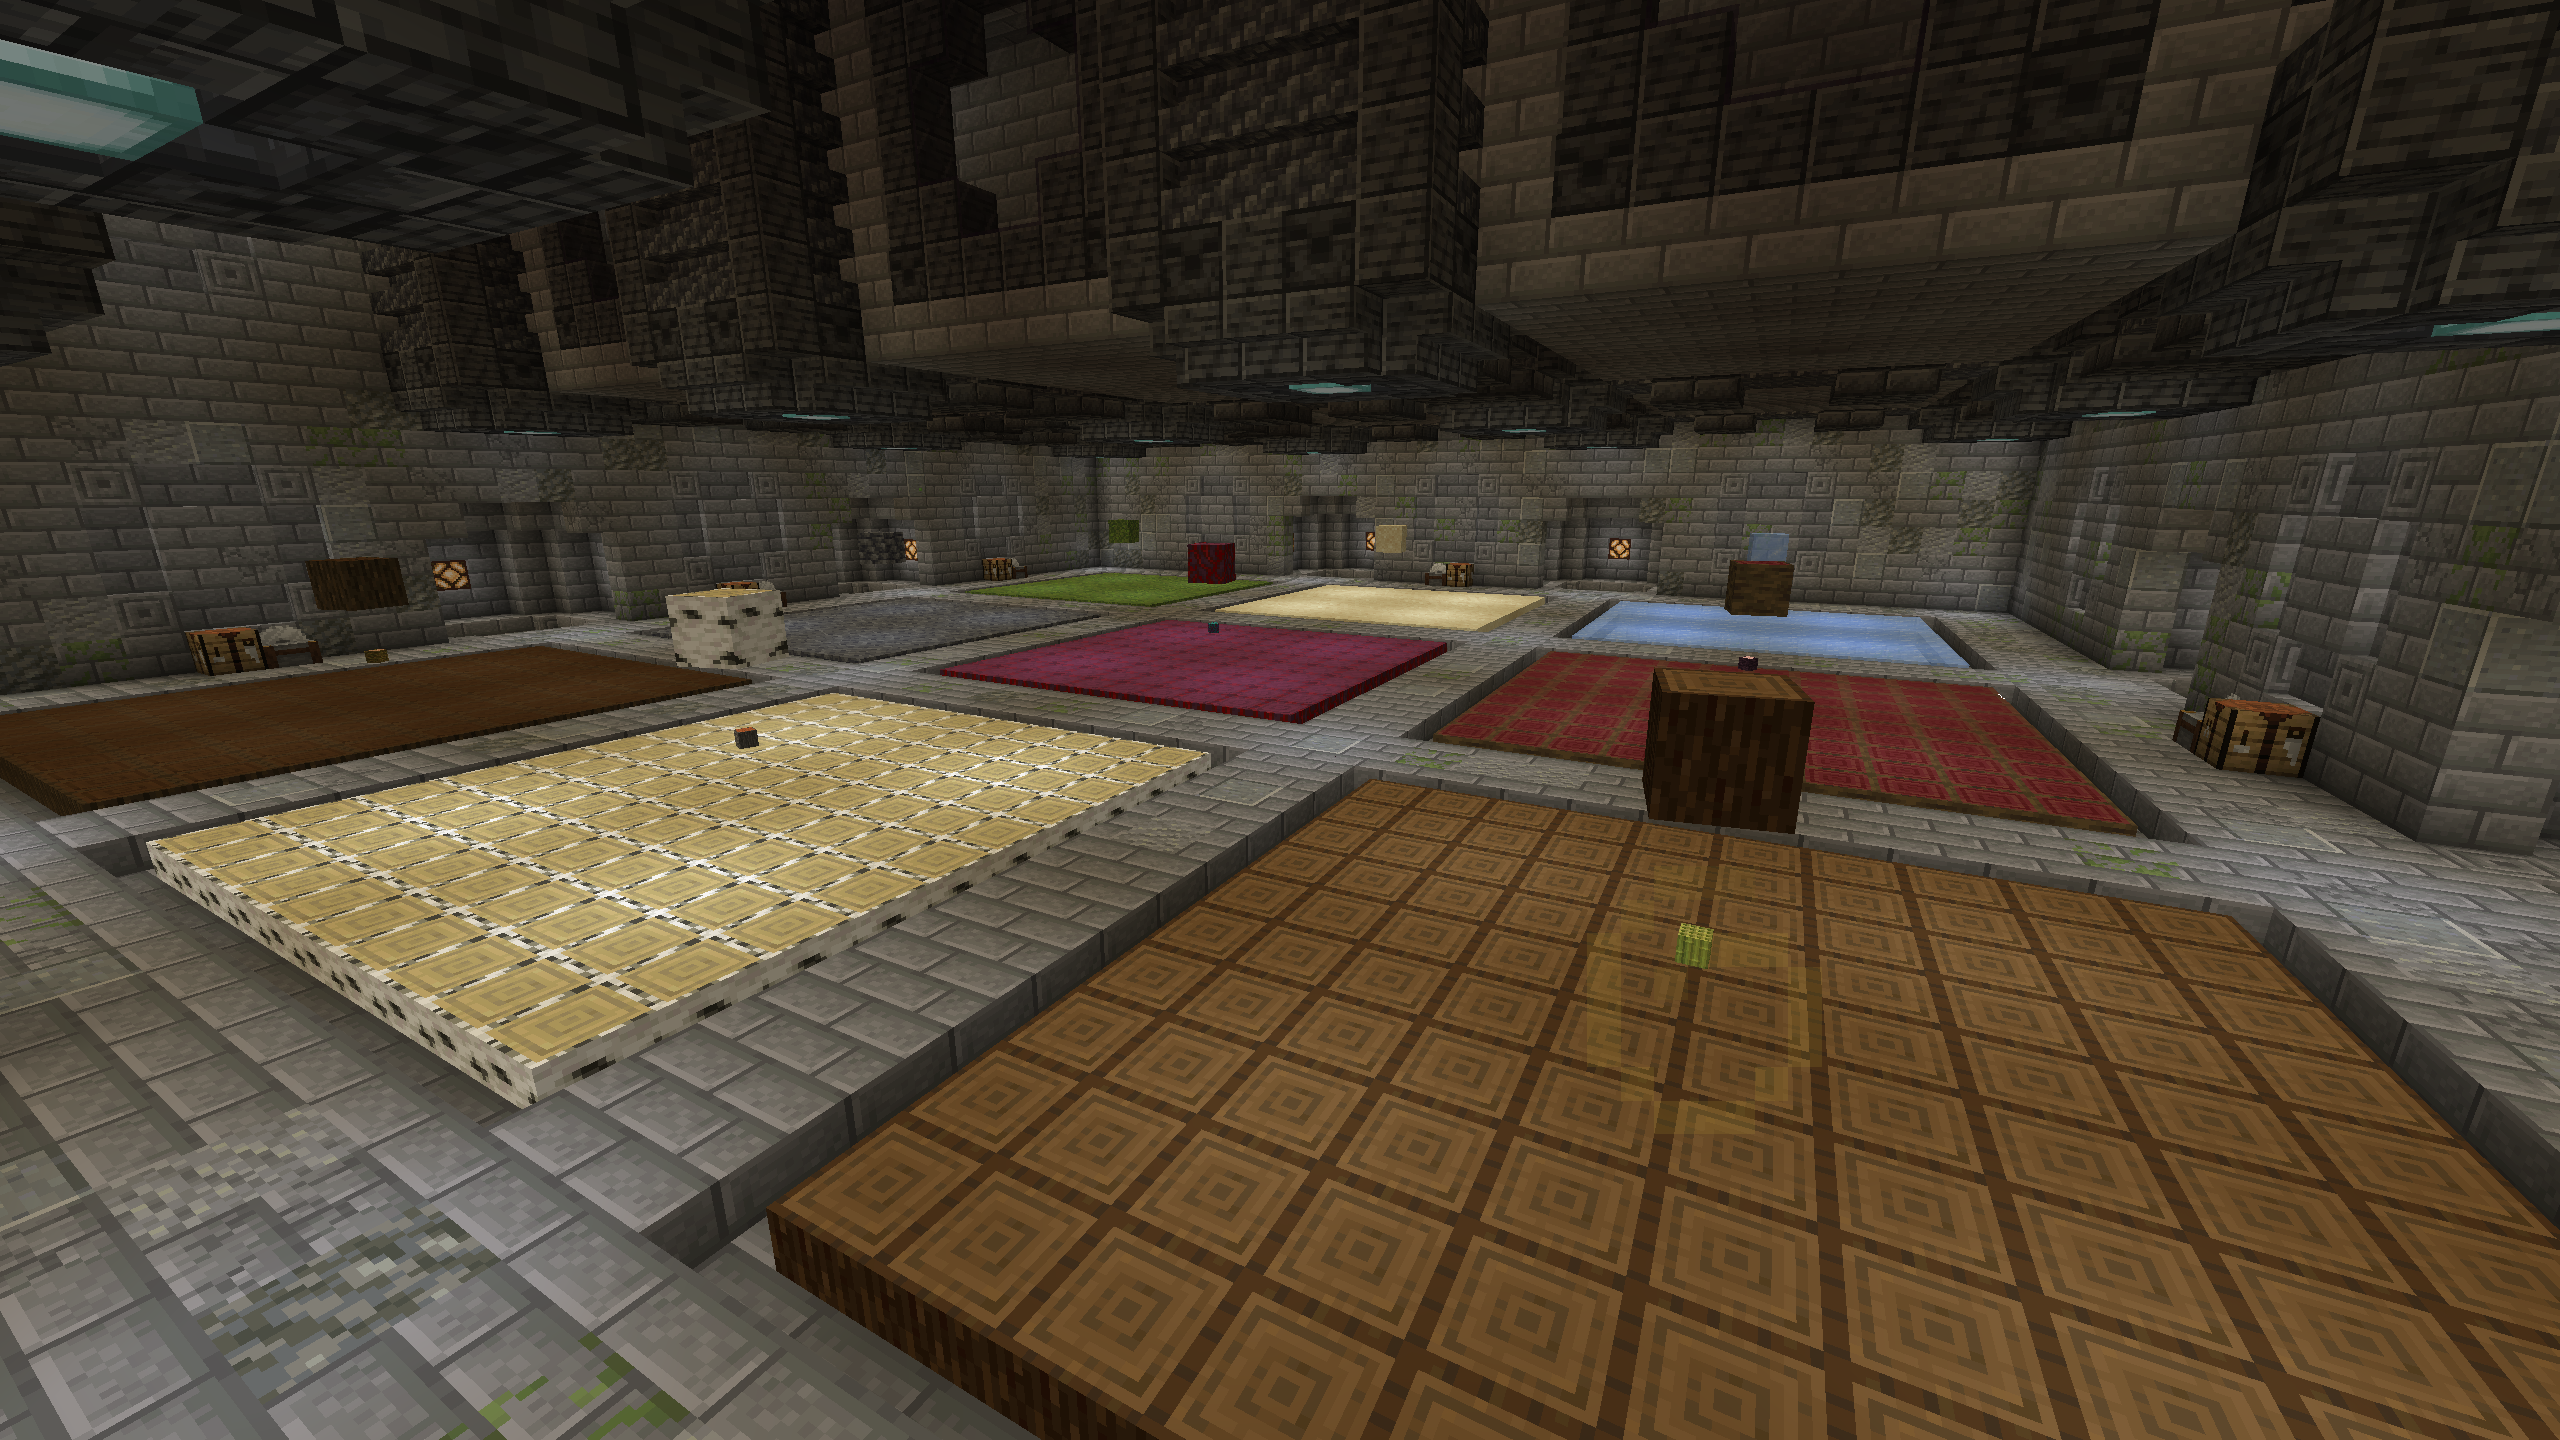
Using the Block Pit
When you enter the Block Pit, you'll first enter a viewing platform with a section of the floor made of cyan terracotta. You can place shulker boxes on the terracotta floor.
Inside the Block Pit, you can break blocks in all of the ten block zones. You cannot place blocks in the block zones. Each zone has a large rotating block display display called the Current Block that shows which block that zone is set to. All zones will periodically refill if no player is located inside them. You can trigger a refill manually by right-clicking the Current Block if no player is inside.
Each zone has multiple blocks which can be set to fill. You can left-click the Current Block to advance through a zone's cycle. This will also change all blocks inside the zone and refill if no player is inside. The next block in the cycle is shown as a small rotating block below the Current Block.
Creating a Town
We allow player-created towns to be added to the Hub. Anyone can create a town, but it must meet some requirements before it can be added to the hub. A town must:
- Follow all rules;
- Have a coherent name (15 chars max);
- Be in either Pyrrhia or Pantala;
- Be accessible without teleport;
- Have a city hall;
- Have a designated TP point (it may be in the city hall);
- Have a mailing center (it may be in the city hall);
- Have a sign board indicating the name, founder and (optional) other contributors (it may be in the city hall); and
- Have five residents
If it meets all these requirements, multiple staff members will visit your town and judge it based on the quality and effort. Higher-quality, more complete towns are more likely to be accepted. If it is accepted, the TP point and mail center will be activated and your town will be added to the Hub! If not accepted, don't worry — we'll give you some feedback, and you can apply the necessary changes and try again.